Saturday, May 21, 2016

Confession Of A Hoarder

Like many crafters, I hoard not only regular supplies, but office supplies as well. Come school shopping time I load up on ten cent folders and quarter pencil sharpeners like I actually have a use for them. Then the 'drives' happen and everything I bought from last year goes into a bin outside the store I am re-loading up at. One such supply addiction is post it notes. I had learned a few years back to make a very cute, clever holder that fits into your purse, but immediately found myself upgrading the design to fit my needs. My much larger needs. See, when I use a post-it note, I tend to use somewhere between three and thirty. Even my notes are rambling. Oy!
So I rehabbed the design and made it Tracy friendly, to fit a useful size note. These are often available at the dollar stores in multi packs. they are rarely actually sticky so you have to 'stickify' it yourself. Perhaps with super red tape. The supplies you will need are:

2- cardboard pieces sized 6 1/2 x 4 3/4
2- pretty papers, 7 x 5 1/4

velvet, leather, suede, or other magical papers:
1- 2 x 6 3/4 piece
1- 9 1/2 x 6 5/8 piece
1- 1 1/2 x 3 piece

one Velcro sticky dot

paper pad
decoupauge glue
any gems or glitter you may need to 'fancify' the cover


The first step to this fabulous folder/holder is to decoupage those cardboard pieces with your chosen pretty paper. Feel free to add stamped images, photos, or zany sayings. when you have your paper in place fold in the excess, this will keep the look professional, rather than snipping right along the edge.
While those are drying fold your 1 1/2 x 3 inch piece of magical paper so it is now 3/4 by three, with whatever beauty it holds showing both front and back.
Use your 2 x 6 3/4 inch piece of magical paper to join the cardboard pieces, leaving a half in between them. Your magic paper will overlap both cardboard pieces and secure a 1/2 inch space between them. This is necessary to accommodate the notepad. Use glue only on the backside, so as not to ruin the beauty of your spine.
Flip this over. You should be looking at the 'ugly' side of the cardboard and a 1/2 gap of the back side of the magic paper. Halfway down the right edge you will glue the small strip about 1/2 inch in. Smother he wrong side of the magic paper with decoupage glue. Seal in all that ugliness with this beautiful paper. 
Secure your notebook in place by whatever means necessary. Add a Velcro dot to the end of the flap and remove the adhesive backing. Close the cover and allow the Velcro to place itself where necessary! Add bling, with gems, stickers, glitter, whatever!


Friday, May 6, 2016

Desktop Decor

Sometimes I just want to play. That's when I pull out the coloring books, or print up a coloring page. This image inspired me to play, and I couldn't wait to frame it and build some flowers. The image is from mosdigitalpencil.com and the Flower Builder Sizzix is from Stampin' Up!.http://www.stampinup.com/home/en-US/ (use demonstrator ID 2163910 for shopping).

My two darling girls inspired the color choices, With the little one loving purples and the older one loving blue. The background is a digi paper available at mosdigitalpencil.

My favorite of the flowers is the off white, which is (drumroll) coffee filters! The red is shimmer is available at Joanne's (http://www.joann.com/crafters-companion-shimmering-cardstock---candy-red/14220180.html). The purple is a double sided cardstock that is older than my children, so I really don;t know the brand. Centered in each flower is a adhesive enamel dot, available at many sources including Stampin' Up!

Tuesday, May 3, 2016

A Sticker Situation

We all have those stickers that do not have a use; all consonants, weird sayings, random numbers. I am here to remind you there is a use for all this. These old school tips and tricks are tried and true... and often forgotten.

First off, think of journaling. Is there a place where a beautiful font might start off a journal-ed sentence? How often have you read in books, 'Once Upon A Time....' where just the O is super fancy? It is in this spirit you might work. What about words to highlight, within the sentence? Using the same idea, just use that 'Z' as you write zealous! Another great way is at names, or just initials. Go ahead and use those numbers instead of writing out seven.

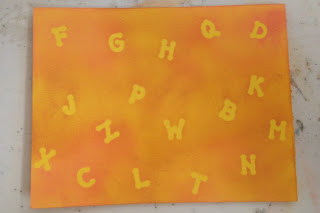
Next, think of them as stencils! Lay them on your paper and ink or spray around them! In the case of a strange sticker shape, I revert back to journaling; use this 'empty' space to journal or doodle in! Once the ink has dried, gently peel the stickers off. You will have a fabulous paper, and no one will notice a lack of letters or numbers.

My example and instructions uses 'Bedtime Story' from Mosdigitalpencil.com.

1. Lay your stickers on paper, choose ink or sprays that go well together.
2.Begin by randomly inking areas with one color.


3.Add second color.


4.Remove stickers.


Create!